The quadratic surface that gave me the most trouble was the hyperbolic paraboloid. This surface could not be created in Cinema 4D and had to be imported from Mathematica. When I imported the surface from Mathematica the center of the saddle had hundreds of little polygons that overlapped, which became a huge problem when I tried to extrude them to give the surface thickness.
I had to spend a long time experimenting to find the lowest number of plot points I could use in Mathematica and still get an accurate object.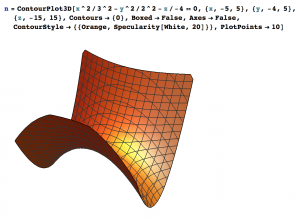 Once I had done this I did the same thing with the optimize tool in Cinema 4D to see how big I could make the polygons before the surface started to lose accuracy. The first time I went through all these steps the hyperbolic paraboloid I had chosen just didn’t work correctly. So, I went back to the beginning and created a new Mathematica file of a hyperbolic paraboloid, and spent some time deciding where to cut it off to create edges that were as straight as possible.
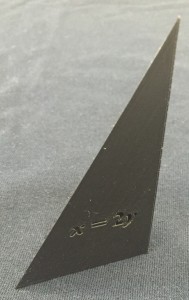
 Once I had done this and imported the surface into Mathmatica I optimized the surface as much as it would allow and extruded it. Finally I had a surface I could print! I then added the hyperbolic paraboloid’s equation to the surface. Instead of just imprinted the equation, since the surface was so thin I punched it all the way through.
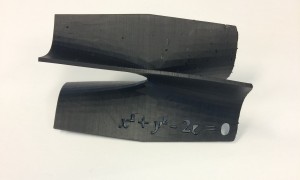
In order to print this surface I used the FormLabs liquid printer. When the object came out of the printer it looked great and only had a few minor flaws to fix after this first print. One of the issues was the size of the object; it was just a little too small. The other issue was that the 2 in the exponent of the equation didn’t quite form correctly because it was too small. The final issues was that the equation had a \(+\) sign where there should have been a \(–\) sign (oops).  The equation was little too long with a 0 that was missing its center. To fix these problems I rearranged the equation (and fixed the sign issues) in Adobe Illustrator and then punched it through the surface again. The second print on the liquid printed I made 1.4 times larger than the last print.
 The final print still had issues with the formula but otherwise worked out well. We are currently looking into changing the font to see if that helps with this issue. This model can be found on Thingiverse here.

Using my experiences building this and the other quadratic surfaces, I’ve put together a set of instructions on how to build quadratic surfaces using Mathematica and Cinema 4D. This can be found here.


 Then I optimized the object by 0.02cm. With the first cone I made I reversed the normals so they were facing outwards from the cone surface. When I extruded the surface by 0.25cm this automatically gave center of the object more thickness. Unfortunately I realized that while it gave the center thickness, it also offset the lines of the cone so they didn’t match up, which is not what we wanted. In order to fix this problem I did the same thing but did not reverse the normals (so they were facing the inside) and extruded the surface to give the cone thickness.

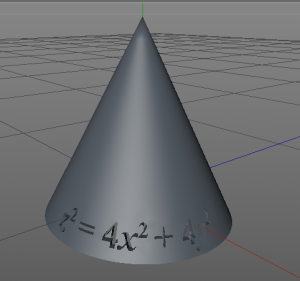 In order to do this I used the same formula spline except this time from only \(t=-2\) to \(t=0\) and copied and rotated it to create the second half. On one half I put the equation for the cone \(\frac{z^2}{4}=x^2+y^2\) and immediately ran into trouble. I had used too many subdivisions (72) and the object was not accepting the Boole with the equation. After creating many different cones with different subdivisions I found that 60 worked. Once this problem was solved I added the equations to one of the halves of my cone and printed it. When I added the equation I put it all the way through the surface and not just imprinted on it since the object had very little thickness to it.


 The first print I did of the ellipsoid I cancelled the print early on so that I could inspect the sides. The surface looked a bit melty, where the filament had shrunk. We decided this was fine and to try to print it again.
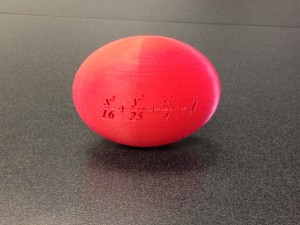 This time when I printed it I decided to put the equations on the top of the ellipse and use a raft. It printed perfectly.
 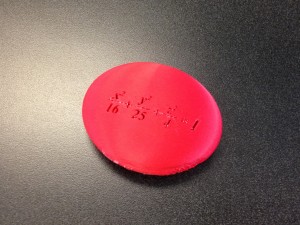 After my success with my second ellipsoid I decided to try to print my first ellipsoid again and this time with a raft. The object never fell over and printed perfectly. These ellipsoids can be found on Thingiverse


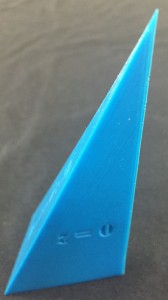

 mple 5 of 12.5 in Stewart’s Essential Calculus), and the latter by \(y=-6, z=0, z=x+4\), and \(2x+y+z=4\). When I first tried to print the Tetrahedron from the textbook, the equation on the bottom face did not appear. Later, Dave Pfaff told us that it was because the object was inside out in Cinema 4D. I fixed the issue by reversing the normals on the object.
 increases. Next, I used a raft to print the two shapes, but the equations looked awful. So then I used some ABS juice on the half of the build-plate that contained the sharp vertex of Professor Keller’s tetrahedron and the print came out well, except for a messy-looking number “4” and some stringy filament on one of the faces (see blue shape).


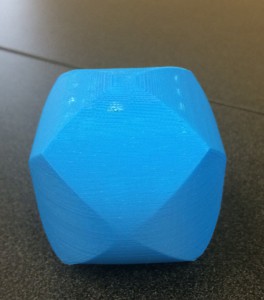
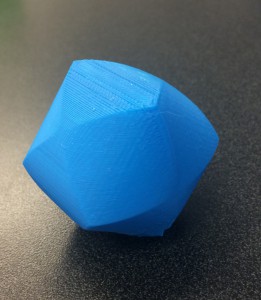
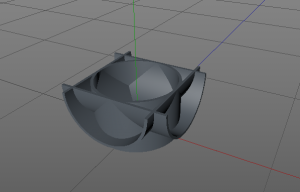 For the three cylinders I created them from scratch in Cinema 4D using the ‘Tube’ object. Creating the three cylinders was very straightforward. After my fail from the two cylinder object I also wanted to create the three intersecting cylinders cut in half, so the inside was visible. This proved to be a little more complicated. I used a ‘Cube’ and ‘Boole’ with each tube in order to get half cylinders. Then I was able to merge them together using a very similar process to putting equations on solids in Cinema 4D.