New Torus Link, Improved Visualizations, and Cinema 4D Problems.

Written by Hillis Burns, Shannon Timoney, Hall Pritchard (students in Math 383D Knot Theory Spring 2023).

We created the T(2, 8) torus link (or 821 link) using Cinema 4D. The equations for this two component link are x = Cos[t]*(3+Cos[4t]), y = Sin[t]*(3+Cos[4t]), and z = Sin[4t]. The second component is created by the equations x = Cos[t]*(3+Cos[4t+Pi]), y = Sin[t]*(3+Cos[4t+Pi]), and z = Sin[4t+Pi].

We also created the T(3, 3) torus link (or 632 link). With the  632 link, each of the three components goes around the longitude once and goes around the meridian once. The equations for this knot are x1 = Cos[t]*(3+Cos[t]), y1 = Sin[t]*(3+Cos[t]), z1 = Sin[t], x2 = Cos[t]*(3+Cos[t+2*Pi/3]), y2 = Sin[t]*(3+Cos[t+2*Pi/3]), z2 = Sin[t+2*Pi/3], and x3 = Cos[t]*(3+Cos[t+4*Pi/3]), y3 = Sin[t]*(3+Cos[t+4*Pi/3]), z3 = Sin[t+4*Pi/3].

Image showing the T(3,3) torus link lying on the torus.

The T(3,3) torus link shown lying on the torus.

After creating the T(3, 3) or 632 link, we wanted to build a model that helps demonstrate what the torus link actually is. We did this by first opening back up the T(3, 6) or 632  in Cinema 4D. Then we created a torus surface and rotated it 90° so that the torus link sat in the right position on the torus surface. Then we changed the radius of both the meridian and the longitude so that the 3d model was in a presentable format. Our final model which is shown above gives a good physical representation of how a torus link is constructed.

We also created the  T(3, 6) torus link (or 633 link). With the 633 link, each of the three components goes once around the longitude and goes three times around the meridian. The equations for this knot are x1 = Cos[t]*(3+Cos[2t]), y1 = Sin[1t]*(3+Cos[2t]), z1 = Sin[2t], x2 = Cos[t]*(3+Cos[2t+2*Pi/3]), y2 = Sin[t]*(3+Cos[2t+Pi]), z2 = Sin[2t+2*Pi/3], and x3 = Cos[t]*(3+Cos[2t+4*Pi/3]), y3 = Sin[t]*(3+Cos[2t+4*Pi/3]), z3 = Sin[2t+4*Pi/3].

While using the Cinema 4D software, the biggest problem we had was fixing the join at the end of two strands. In Cinema 4D, the join will sometimes not look correct. In order to fix this, we will first decrease the period of the parametric equations in order to make the join fully noticeable. We decreased it from 2π (~6.28) to 6.275.

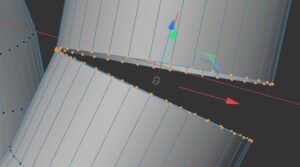
Image showing the two ends of the torus link with too many points highlighted

Too many points are highlighted near the ends of the torus link.

We then try to highlight all the points at the end of the knot, in order to use the “stitch and sew” function. We came across problems when we accidentally highlighted other points not at the end. This is shown in the figure to the right. This would happen more often when we increased the sample size to a number that was higher than necessary (>300). This is the case in the image below. By decreasing the sample size, it made it easier to highlight just the end points of the knot, as shown below. At this point we were able to successfully use the “stitch and sew” function.

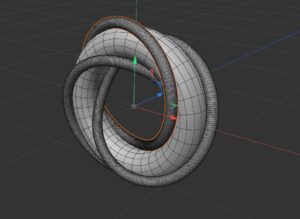
Image showing points highlighted along the ends of the torus link.

This image shows that just the end points of the two ends of the torus link are highlighted. This allowed us to successfully use the Stitch and Sew function to join the ends together.

Knots as ribbons

I’ve continued with my project to edit the 3D printed models my Fall 2014 Math 341 Introduction to Topology class made. Recently, I came across two of my favorite pieces. The first is a model that was designed by Emily Jaekle (’16) and is a ribbon version of the (3,5) torus knot.

IMG_4407    IMG_4458

This \((5,3)\) ribbon torus knot was designed entirely in Cinema4D. The curve was created using the Formula tool with parametrization \(x(t)=(2+\cos(5t))\cos(3t), y(t)=(2+\cos(5t))\sin(3t), z(t)=-\sin(5t)\) for \(t\in[-\pi, \pi]\). The trianglulated surface was created by first adding in a small rectangle, then using the SweepNurbs (without caps). The rectangle was also rotated 1800 degrees in the process. The small gap was fixed using the Bridge tool in Edge mode. This ribbon knot was originally printed in blue on the Projet-260 3D Systems printer. Later, I printed it on the FormLabs 1+ printer in black resin. You can find the model here on Thingiverse.

The second model was designed by Cathy Wang (’15) and is a ribbon version of the (3,2) trefoil knot with an amazing color scheme.

IMG_4404The entire model was designed in Cinema4D. The knot was created using the Formula tool with parametrization \(x(t)=(2+\cos(2t))\cos(3t), y(t)=(2+\cos(2t))\sin(3t), z(t)=-\sin(2t)\) for \(t\in[-\pi,\pi]\). The trianglulated surface was created by first adding in a small rectangle, then using the SweepNurbs (without caps). The width and height of the rectangle was adjusted so the band is not a constant size through the knot. The overlapping edges and small gaps were also fixed. Finally, the knot was colored with a beautiful rainbow-gradient. This ribbon knot was originally printed in rainbow colors on the Projet-260 3D Systems printer. Later, I printed it on the FormLabs 1+ printer in black resin. You can find the model here on Thingiverse.

Math at the Simon’s Center for Geometry and Physics

IMG_3442I had the very great privilege of being a co-organizer of a workshop held at the Simon’s Center for Geometry and Physics and NYU Stony Brook. This was the workshop on the Symplectic and Algebraic Geometry in the Statistical Physics of Polymers. It was my first time to this campus, and I had a blast with both the math at the workshop AND all the visualization of math in the environment.

My first hint that things were going to be special, was the fantastic Umbilic Torus sculpture found at the end of an avenue of trees between the center and the math department.

IMG_3434The sculpture is by Dr Helamun Ferguson, click  here to find a photo gallery showing the design and construction of the piece. 

The sculpture consists of a space filling curve all over the surface of the sculpture. The sharp curve along the edges is a trefoil knot, winding three times around the central hole (the longitude on the torus) and twice around the sculpture the other way (the meridian on the torus).

The base of the sculpture is a large round granite disk with a 3 sided deltoid mirroring the 3-fold symmetry of the sculpture overhead. The base had to be left to settle for a year, and was greatly loved by the local skate-boarders!

84-umbilictorus-5392IMG_3435

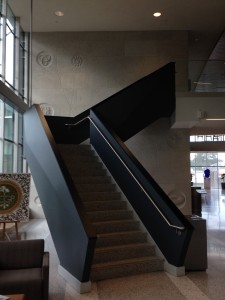
The Simon’s Center itself is in a wonderful airy building, with mathematical themes blended seamlessly in the design. I kept finding treasures as the workshop went on. The most obvious, is the sandstone wall behind the stair case leading up to the cafe on the second floor. It is covered with small math motifs from knots, to physics, to finding the square root of 2.

IMG_3443IMG_3453

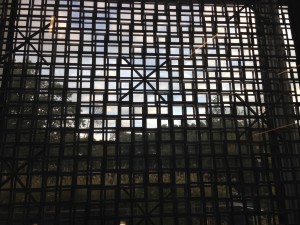
Even the screens on the side of the first floor lounge are mathematical, with different tilings of the plane illustrated. Just love the artistry of the designs in them.

IMG_3465 IMG_3464 IMG_3462


Torus Knots

I modeled the trefoil knot as two torus knots \(T(2,3)\) and \(T(3,2)\). The parametric equations for a \(T(p,q) \) knot are \(x = \cos(pt)*(3+\cos(qt)), y=\sin(pt)*(3+\cos(qt)) \), and \(z=\sin(qt) \). Here, \(p\) is the number of times the knot winds around the longitude of a torus, and \(q\) is the number of times the knot winds around the meridian of a torus.

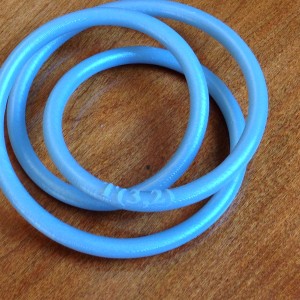
2-3-torus-2Both models were printed on the FormLabs printer. I first made a small \(T(2,3) \) knot with a label extruded out of the curve (as shown to the left). I used Cinema 4D to design the model by using the Formula Spline to draw the curve, the Sweep NURB to give the curve depth, and the Wrap Tool to wrap the text around the curve. I also used the Extrude Tool to give the equations depth and the Boole Tool to connect the equations to the curve. For both knots I had to make sure the ends of the knots overlapped correctly. Before printing the \(T(3,2)\) knot, I had to change the range of \(t\) to \(t=[0, 2\pi] \) instead of \(t=[0, 5\pi]\) (I initially used \(5\pi\) to be sure that the curve closed).

3-2-torus-2The first \(T(2,3)\) knot came out nicely, however the text was a little small. Using the subscript made the numbers too small, so I reprinted the knot used parentheses instead, as shown here. The \(T(3,2)\) knot also looked great, as it was smooth and there were merely small nubs where the supports were, which could be removed with an exacto blade. We’ve discovered that the FormLabs printer makes smoother surfaces and finer curves than does the MakerBot, which is why it is ideal for printing knots.

You can find the torus knots on Thingiverse here T(2,3) and here T(3,2). Instructions on how to make torus knots in Cinema 4D can be found here. Professor Denne has also created another worksheet in Mathematica about Torus knots. It can be found here.